Raspberry Pi setup
1 — Download the iso file
You can download the iso from the following link. Currently (Oct 2019) there are 3 versions available.
Depending on the size of microSD card, and your requirements, pick the corresponding iso and download it.
2 — Burn the image into the microSD card
For Mac users
(I have downloaded into Downloads folder)
Check the drives before inserting the microSD card using the following command
df -h
Now check the drives after inserting the microSD. You will see an additional drive. (Example: /dev/disk3. here the disk-number is 3)
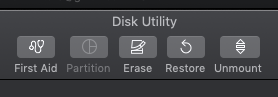
Unmount the microSD card. You can go to disk utility tool and click on corresponding external drive and click on unmount
Now burn the ios using the following command
sudo dd bs=1m if=your-image-file-name.img of=/dev/rdisk[disk-number] conv=sync
replace the bold text in above command with corresponding one. Mine looks as below:
sudo dd bs=1m if=2019–09–26-raspbian-buster-lite.img of=/dev/rdisk3 conv=sync
It might take a couple of minutes. Use rdisk instead of disk to run the command quiker.
To check status, you can press Cntl + T and, you can see output similar to

On Ubuntu, you can try the following to burn the iso
sudo dd if=your-image-file-name.img of=/dev/disk[disk-number] bs=4M status=progress conv=fsync
For instance, after replacing the bold text with corresponding values, it might look like below
sudo dd if=2019–07–10-raspbian-buster-full.img of=/dev/sdc bs=4M status=progress conv=fsync
3 — Few things to do when you first setup the raspberry pi
A. Change default password
B. Change timezone
C. Enable ssh
D. Create keys for password-less login


Comments
Post a Comment